The importance of first impressions can’t be emphasized enough. This holds true in many instances, and yes, even in regards to social media. One of the first things to consider when you think about first impressions on Facebook are the images on your Timeline as fans will see this when they first visit your business page. The images you choose for your profile picture and cover photo are critical pieces of your branding package. The profile picture not only appears on top of the cover image, it also acts as an anchor in the news feed, as the little thumbnail that will always be tied to your brand name with each wall post. We recommend using your logo here. The cover photo represents another aspect of your brand that can help boost brand positioning, personality and associations. Are your photos optimized to make the maximum first impression and branding on Facebook for your business’s Timeline?
How to Optimize Your Profile Picture and Thumbnail on your Business’s Facebook Timeline
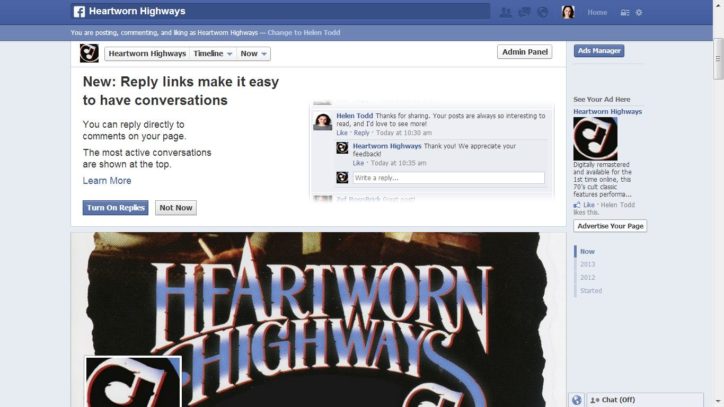
The profile picture appears as a smaller square on your business page as part of the Timeline’s top area designated for you to showcase your brand. Profile pictures should house your company’s logo.
It’s important to understand the the profile picture also serves as your business page’s thumbnail. This thumbnail appears by every wall post your page publishes and is an important aspect in branding your content that is distributed throughout Facebook’s platform, whether to your fans’ News Feeds on their home pages or smart phones. Despite what the wall post copy contains, the thumbnail and page name will brand the content. In order to maximize this real estate we suggest using your logo for the profile picture.
Keep in mind how your logo will appear in the News Feed after you publish wall posts. For example, you might want to rethink your logo or logo’s borders if it includes a lot of white space. When your post is in the News Feed, the tiny thumbnail of a mostly white logo becomes transparent with the background. It won’t help with your branding efforts or catching attention in the News Feed if no one can see it.
If you have had a logo made or designed one yourself, it would be wise to have your designer or graphics person customize your logo to fit the Facebook specs. This will ensure your profile picture pops, as well as seamlessly transforms into the thumbnail. Remember, this photo will be the tiny image that acts as a visual cue for your brand in the News Feed – ensure it packs a punch!
Timeline Profile Picture and Thumbnail Specs
When your photos are optimized correctly for the Facebook Timeline, they will increase brand awareness on Facebook. The key to an optimized Facebook profile picture is making sure your images meets the suggested specs. Facebook recommends uploading an image with dimensions of 200 pixels wide. Your profile picture will appear in the news feed as a 32 x 32 pixel thumbnail and part of the edges will be cropped from the original photo you upload (175 x175 within a 200×200 profile picture is a good guide to use for understanding what will appear as the cropped and smaller thumbnail).
If you have optimized your image to the Facebook profile picture specs, you should be good to go, however, on the occasion you still need to adjust your profile picture to create a nicer thumbnail, it is pretty simple to do. To tailor the part of your profile picture you want to be seen in the thumbnail, do the following:
- Hover your mouse over your profile picture and click “Change Picture” in the top right corner.
- Select “Edit Thumbnail”.
- Click on the image to adjust it, and then save your changes.
How to Optimize Your Cover Image on your Business’s Facebook Timeline
A second opportunity to optimize your branding on Facebook is the cover image. This image should speak more to your brand personality, rather than just including names and logos. The images splashes across the entire top for your brand page, and is noticed most when fans’ eyes first land on your page. The cover image should be carefully crafted and thought out to meet the image specs and align with your branding. Some brands use their latest print ad as a cover, other’s emphasize the personality of their brand through the photo. Regardless of your branding strategy, it is essential you abide by the cover guidelines laid out by Facebook:
“All covers are public. This means that anyone who visits your Page will be able to see your cover. Covers can’t be deceptive, misleading, or infringe on anyone else’s copyright. You may not encourage people to upload your cover to their personal timelines.
Covers may not include:
- price or purchase information, such as “40% off” or “Download it on socialmusic.com”;
- contact information such as a website address, email, mailing address, or information that should go in your Page’s “About” section;
- references to Facebook features or actions, such as “Like” of “Share” or an arrow pointing from the cover photo to any of these features; or
- calls to action, such as “Get it now” or “Tell your friends.”
Cover Image Specs
Cover Image: 315 px high x 851 px wide (Something to be mindful of here is making sure the photo is positioned correctly. This option appears as soon as you upload a cover image. You don’t want the photo showing only the top half; take a moment to reposition the photo how you want it to appear before clicking “save”.) Also keep in mind that the profile image will sit on top of the cover image so make sure nothing important will be hidden by the profile picture.
To edit your cover image, do the following:
- Hover your mouse over the bottom right corner of your cover image and click “Change Picture” in the top right corner of the edit box.
- Select “Change Cover”.
- Click on the image to adjust it, and then save your changes.
In Conclusion
Keep in mind the important role photos play on Facebook and make sure your images are optimized and sized to the correct specs. You will be all set to put your best face, logo, product picture, and so on forward to project the strong brand presence an optimized Facebook Timeline gives.
Post written by Tia Marie Kemp aka @TiaMarieKemp. To learn more from Sociality Squared, become a fan!


